

We are thorough believers in making things by hand here at Little Worlds Interactive. Especially when it's time to exhibit the new game I just can't resist rolling up my sleeves and breaking out the glue gun! This weekend I made bundles of scrolls and wanted to share with you a few quick and easy steps to make your own:
Things You'll Need:
- Paper
- Tea bag
- Ribbon
- Glue
Step 1: Write with a Flourish
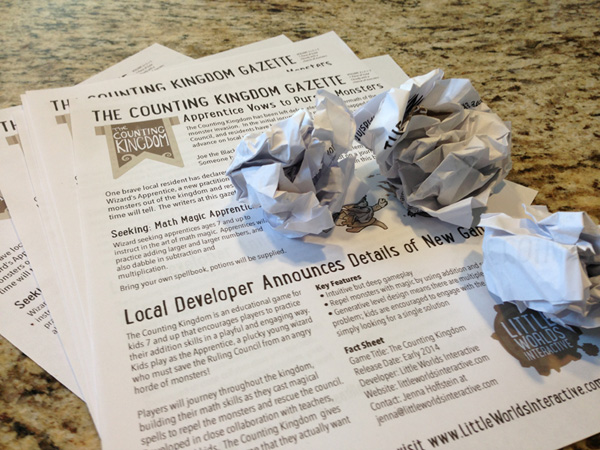
Print or write whatever you would like onto your paper. I strongly suggest testing out your ink before you invest time into a nice design: let the ink dry on some test paper, then brush water over it to see if it will run. I printed out my newsletter and found that color ink ran worse than black.
Step 2: Crumple it up
Take your piece of paper and crumple it into a ball. This will give it some nice irregular lines and make it look more worn.
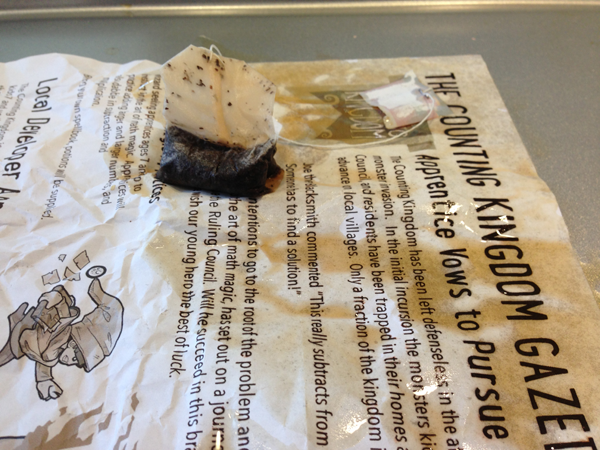
Step 3: Tea Time
Heat up some hot water and drop in your tea bag to let it steep. Meanwhile, (carefully!) uncrumple your paper and lay it flat on a baking tray, or another waterproof surface that has edges. Take the tea bag and dab it all over the paper, dunking it back into the water when you need more and eventually covering the whole page. Make sure the tea has soaked through to the back of the paper. If you're making more than one scroll you will need a new tea bag every few pieces of paper.
Step 5: Let it Dry
There are a few different ways you can do this, depending on your space. I laid out my papers onto towels on the floor (on top of a tarp so the tea didn't soak through), but it might take a few hours to dry this way. Hanging the papers on a clothesline is also an option, and would be much speedier. (Cats are optional)!

Step 6: Add the Ribbon
Now that the papers are dry we can roll them up. Find something slim and cylindrical to wrap the papers around, like a candle. Cut a small section of ribbon, long enough to wrap around your scroll roughly 1.5 times. Lay one end of the ribbon halfway down the scroll length-wise, and add a daub of glue (I used a glue gun but other types of glue could work as well). Wrap the ribbon around the scroll so that the glue-free end is pressed on top of the glue. You should have a small bit of ribbon hanging free - cut a small "V" into it to finish things off. Slide the scroll off the cylinder and you're done!


There you have it! You can make a single scroll or a whole stack. Have fun!
